Challenge: Image gallery
Learnwebdevelopment/Core/Scripting/Networkrequests
Learn_web_development/Core/Scripting/Network_requests
In this challenge, we'll get you to build a fairly common item you'll see on a lot of websites — a JavaScript-powered image gallery. Along the way, you'll be tested on your knowledge of loops, functions, conditionals, events, DOM scripting, and object basics.
Starting point
To begin, click the Play button in one of the code panels below to open the provided example in the MDN Playground. You'll then follow the instructions in the Project brief section to complete the JavaScript functionality.
The HTML looks like so:
```html live-sample___gallery-start live-sample___gallery-finish
Image gallery example
The starting JavaScript looks like this:

```js live-sample___gallery-start
const displayedImage = document.querySelector(".displayed-img");
const thumbBar = document.querySelector(".thumb-bar");

const btn = document.querySelector("button");
const overlay = document.querySelector(".overlay");
100%
```css hidden live-sample___gallery-start live-sample___gallery-finish body { font-family: sans-serif; width: 640px; margin: 0 auto; background-color: lightgray; }
h1 { text-align: center; }
.full-img { position: relative; display: block; width: 640px; height: 480px; margin-bottom: 2px; }
.overlay { position: absolute; top: 0; left: 0; width: 640px; height: 480px; }
button { background: rgb(150 150 150 / 0.6); border: 1px solid #999999; position: absolute; cursor: pointer; top: 2px; left: 2px; }
button:hover, button:focus { color: rgb(150 150 150 / 1); background-color: black; }
.thumb-bar { display: flex; gap: 2px; cursor: pointer; }
.thumb-bar img { display: block; width: 100px; flex: 1; }
.thumb-bar img:hover, .thumb-bar img:focus { outline: 2px solid blue; }
We've hidden the gallery CSS for brevity, but you can see it when you look at the app in the MDN Playground.

## Project brief

You have been provided with some HTML, CSS, and a few lines of JavaScript code. Your job is to follow the instructions below, writing the necessary JavaScript to turn this into a working image gallery.

The gallery will consist of a large image and a row of thumbnails. When a thumbnail is clicked or tabbed to and <kbd>Enter</kbd>/<kbd>Return</kbd> then pressed, that thumb should then display as the large image. The relevant `<img>` element should also be updated with the correct `alt` text.

In the top-left corner there is a button that, when repeatedly pressed, toggles the large image between a darker and lighter tint, achieved by changing the transparency of a `<div>` element that has been overlaid on top of the large image.

The images you need to embed in the example and their required `alt` text are as follows:

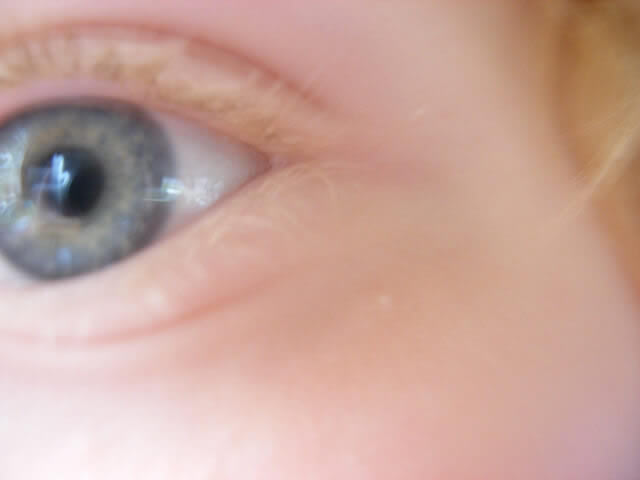
- [`pic1.jpg`](https://mdn.github.io/shared-assets/images/examples/learn/gallery/pic1.jpg): "Closeup of a human eye".
- [`pic2.jpg`](https://mdn.github.io/shared-assets/images/examples/learn/gallery/pic2.jpg): "Rock that looks like a wave".
- [`pic3.jpg`](https://mdn.github.io/shared-assets/images/examples/learn/gallery/pic3.jpg): "Purple and white pansies".
- [`pic4.jpg`](https://mdn.github.io/shared-assets/images/examples/learn/gallery/pic4.jpg): "Section of wall from a pharaoh's tomb".
- [`pic5.jpg`](https://mdn.github.io/shared-assets/images/examples/learn/gallery/pic5.jpg): "Large moth on a leaf".

### Create a data object

First of all, we'd like you to declare an array of objects called `images`. Each object should contain two properties:

- `filename`: The name of the image file (not the full URL).
- `alt`: The image's `alt` text.

### Add the images to the thumbnail bar

Next, we want you to loop through the `images` and use some DOM scripting to embed them all on the page via `<img>` elements. They should be included as children of the `<div>` element with the class of `thumb-bar`, which we've already referenced in the `thumbBar` constant.

1. Create a constant called `baseURL` containing the base URL of each image file (all of the URL not including the filename).
2. Create a `for ... of` loop to loop through the `images`.
3. For each image, create a new `<img>` element.
4. Set the `<img>` source to equal the URL of the image, which should be a combination of the `baseURL` and the `filename`, and the `alt` attribute equal to the `alt` text.
5. Add another attribute to the `<img>` to make it focusable via the keyword.
6. Append the `<img>` to the `thumbBar`.
7. Add a `click` event handler to the `<img>` so that when it is clicked, a function called `updateDisplayedImage()` is run, which displays the clicked image at full size. You'll create this function later on.
8. Add another event handler to the `<img>` so that once it is focused via the keyboard, the clicked image can be displayed at full size by pressing the <kbd>Enter</kbd>/<kbd>Return</kbd> key (and no other key). This is a stretch goal that will take a bit of research to figure out.

### Create the `updateDisplayedImage()` function

Now it's time to create the function to display an activated thumbnail at full size. We've stored a reference to the full size `<img>` element in the `displayedImage` constant.

1. Define the `updateDisplayedImage()` function.
2. Inside the function body, set the `displayedImage` source to equal the source of the `<img>` that was activated.
3. Set the `displayedImage` alt text to equal the alt text of the `<img>` that was activated.

### Wire up the Darken/Lighten button

We've stored a reference to the "Darken/Lighten" `<button>` in the `btn` constant, and a reference to the transparent `<div>` we have overlaid on top of the full size `<img>` in the `overlay` constant. We'd like you to:

1. Add a `click` event handler to the `<button>` with an anonymous function set as the handler function.
2. Inside the function body, add a conditional structure that tests whether the `<button>` has a `class` set on it of `dark` or not.
3. If the `<button>` has a `class` of `dark` when clicked, change its text content to `Lighten`, and change the `overlay` element's background color to `rgb(0 0 0 / 0.5)`. Remove the `<button>` element's `dark` class.
4. If the `<button>` _does not_ have a `class` of `dark` when clicked, change its text content to `Darken`, and change the `overlay` element's background color to `rgb(0 0 0 / 0)`. Add the `<button>` element's `dark` class.
5. Can you think of a way to toggle the `dark` class using a single line of code, run after the conditional structure? This is another stretch goal, but give it a go.

## Hints and tips

- You don't need to change the HTML or CSS.

## Example

Your finished app should work like the following live example:

100%

<details>
<summary>Click here to show the solution</summary>

The finished JavaScript should look something like this:

```js live-sample___gallery-finish
const displayedImage = document.querySelector(".displayed-img");
const thumbBar = document.querySelector(".thumb-bar");

const btn = document.querySelector("button");
const overlay = document.querySelector(".overlay");

// Solution: Create a data object

const images = [
  { filename: "pic1.jpg", alt: "Closeup of a human eye" },
  { filename: "pic2.jpg", alt: "Rock that looks like a wave" },
  { filename: "pic3.jpg", alt: "Purple and white pansies" },
  { filename: "pic4.jpg", alt: "Section of wall from a pharaoh's tomb" },
  { filename: "pic5.jpg", alt: "Large moth on a leaf" },
];

// Solution: Loop through the images

// Create a baseURL constant containing the baseURL of the images
const baseURL =
  "https://mdn.github.io/shared-assets/images/examples/learn/gallery/";

// Loop through the images using a for...of loop
for (const image of images) {
  // Create a new image element
  const newImage = document.createElement("img");
  // Set the source and alt text for the image
  newImage.src = `${baseURL}${image.filename}`;
  newImage.alt = image.alt;
  // Make the image focusable via the keyboard
  newImage.tabIndex = "0";
  // Append the image as a child of the thumbBar
  thumbBar.appendChild(newImage);
  // Update the display to show the image full size when a thumb is clicked
  newImage.addEventListener("click", updateDisplayedImage);
  // Update the display to show the image full size when the "Enter" key
  // is pressed after it has been focused
  newImage.addEventListener("keydown", (e) => {
    if (e.code === "Enter") {
      updateDisplayedImage(e);
    }
  });
}

// Solution: Create the updateDisplayedImage() function

function updateDisplayedImage(e) {
  displayedImage.src = e.target.src;
  displayedImage.alt = e.target.alt;
}

// Solution: Wire up the Darken/Lighten button

// Add a click event listener on the button
btn.addEventListener("click", () => {
  // If the button has a "dark" class set,
  // change text to "Lighten" and make the overlay darker
  if (btn.classList.contains("dark")) {
    btn.textContent = "Lighten";
    overlay.style.backgroundColor = "rgb(0 0 0 / 0.5)";
  } else {
    // Else, change text to "Darken" and make
    // the overlay lighter
    btn.textContent = "Darken";
    overlay.style.backgroundColor = "rgb(0 0 0 / 0)";
  }
  // Toggle the class ready for the next button press
  btn.classList.toggle("dark");
});
Learn_web_development/Core/Scripting/Network_requests